How to Resize Partitions in Arch Linux
Summary
Introduction
Running out of space on your root partition can be a frustrating experience when using Arch Linux. Fortunately, resizing your partitions can be done easily with the help of a live USB or CD and the GParted partition editor. In this guide, we’ll walk you through the steps to resize your partitions and increase the size of your root partition in Arch Linux.
Step 1: Boot into a Live USB or CD
Before you can start resizing your partitions, you need to boot your computer using a live USB or CD with a Linux distribution that includes GParted. Ubuntu or Linux Mint are both good options, as they come with GParted pre-installed.
Step 2: Open GParted and Locate Your Root Partition
Once you’ve booted into the live environment, open GParted and locate the partition that contains your root file system. In GParted, the partition will be labeled with the mount point “/”. Take note of the size of your root partition before proceeding with the resizing process.
Step 3: Resize Your Root Partition
To resize your root partition, right-click on the partition and select “Resize/Move”. In the resize dialog, drag the partition’s edge to increase its size. Alternatively, you can enter a new size in the “New size” field.
It’s important to ensure that you leave enough space for other partitions, such as swap or home. As a general rule, it is recommended that you have at least 20 GB of free space for your root partition.
Once you’ve set the new size for your partition, click “Resize/Move” to apply the changes.
Step 4: Apply the Changes
Before you can apply the changes to your partition, you need to click “Apply” in the main GParted window to commit the changes to disk. This will initiate the partition resizing process, which may take some time depending on the size of the partition and the speed of your computer.
Step 5: Shutdown and Reboot
Once the partition resizing process is complete, shut down your computer and remove the live USB or CD. Then, boot your computer normally into Arch Linux.
That’s it! You’ve successfully resized your root partition in Arch Linux.
Here are the screenshots of the partitions before and after resizing:
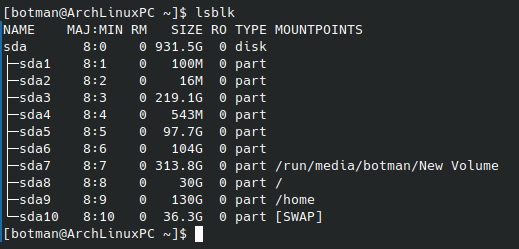
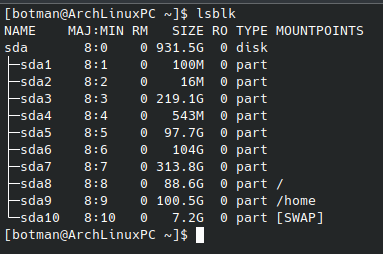
In these screenshots, you can see the partitions /sda8, /sda9, and /sda10 that were successfully resized using GParted to increase the size of the root partition.
Final Words
Resizing partitions is a relatively simple process when using GParted in a live environment. However, it’s important to make a backup of your data before making any changes to your partitions, as there is always a risk of data loss.
In this guide, we’ve walked you through the steps to resize your root partition in Arch Linux. We hope that this guide has been helpful to you.
If you have a dual-boot setup with Arch Linux and Windows, you may also want to consider using a tool like Special Uninstaller to keep your Windows system running smoothly. While Special Uninstaller can help you uninstall any unwanted programs from your Windows-based computer, including those that the standard Windows Add/Remove Programs tool may not be able to remove completely. By removing leftover files and registry entries, Special Uninstaller can help improve the performance and stability of your system, making it easier to manage and maintain in the long run.